11.04.2014

the bane of my existence . oops wrong universe.

pinterest - the bane of my pre-med school existence. srsly.

taking on a mild 7 credit summer semester I be came stir-crazy. it was bad, like bad bad.

finishing up spring semester I decided to take a half load for summer, the recoup time.  about half way through my first block of the semester I went insane with stillness.  so I allowed myself to choose one pinterest project that I would complete, so it had to be good.  well, sad to say pinterest failed me. (even though I still love you pinterest, you help me get my "creative, geek, seeking a perfect wedding jitters" out & about.)  so I decided to go another route, salt lake comic con.  I made the nightingale armor from skyrim for fanx & it was a task. see it here


\so to get started I had to choose a cosplay, well two girlie friends of mine already have a lady thor and female loki, so I decided that we needed a capt. too.

I have to give credit to the wonderful cosplayers that gave me some serious inspiration.

first I went for the classic comic book hero.

 then, I realized that I was doing a gender bend & needed the female look.


& I also admire how well the comics have been turned into movies, so I wanted the more military look. kind of.


to start.  materials


▹ red fabric                     ▹ serger (optional)           ▹ pencil
▹ white fabric                  ▹ sewing machine           ▹ seam guide
▹ blue fabric                   ▹ pins                               ▹ rotary cutter & mat
▹ silver fabric                  ▹ scissors                        ▹ acrylic ruler
▹ matching thread          ▹ measuring tape             ▹ patterns & notations


pants. 

simplicity easy #3633 (has pockets)

blue fabric ⟶ measure for size ⟶ make pants per instructions.  
I did not put the lower pockets on but still made the pants with the upper pockets, which came in handy for the actual con.

to make them "skinnied" aka. make them look less like pajamas.

with the help of my momma, we pinned down either side of the pants (on the outer seam) to fit snug so that they would fit into boots, but not so snug that they're uncomfortable + I wanted a baggier look for the pants.


the jacket top.

simplicity #1361 & this pattern turned out to be more than perfect.  

before you go cutting out pattern pieces and fabric willy-nilly make sure you measure yourself or even better have some one measure you (it's more accurate).  I cannot stress that enough.  I have had many people ask me, "why does the pattern say I need make a size 12 when I wear a size 2 pant?" ⟶ because the sizes are not made the same as store bought clothing.

I made a size 14 because well I did not buy the suggested stretchy fabric and I knew the size 12 wouldn't fit.  & if you're in between sizes go to the larger, it's easier to alter than to start over. 

patten pieces cut out & ready to make the flap that goes across the chest. taking the left over blue fabric I cut out two pieces that matched up with the side seam and the anterior arm seam. 

rough draft of front flap.
following the directions while making the jacket when the side that the flap needed to be sewn to I just added it.

found a simple star online, made it the size I needed it to be then cut it out of silver fabric (actually its more of a silver felted pleather)

for the sleeves I made two rectangles in a similar fashion to how I made all the panels for my nightingale costume: take a cotton fabric to match the silver pleather, sew right sides together, but leave enough space to flip right side out, then sew a 1/8" seam around the outside.

this rectangle is to go on the medial side of the arm, I had to hand sew them on because the sleeve had to be made before the rectangles could be added.

finished following the pattern instructions, including sewing in some shoulder pads (they really do make a difference).
for the red and white stripes corset part, I cut out strips of fabric that were 5" wide and the length was measured from just under my bust down to how long I wanted it to go. 

alternating red and white, I sewed them together and when I got to the end, I added in a zipper.  

for the gloves, I went to zurchers and found cheap red gloves, then used extra red fabric that I had to "extend" them to my elbows. 

for red boots, I couldn't find them anywhere! I searched and searched for weeks.  so I got the brilliant idea of spray painting some boots red.  went to the DI (for those of you outside of Utah, a thrift shop or good will would work) found some $7 boots and $5 dollar can of spray paint and went to town on them.  

with the pants and the top done, a shield ordered on amazon, and boots painted red, my costume was finished.  I put on some red lipstick and a patriotic attitude and I was ready for comic con. 

apologies for not having many pictures on this one. I was in a rush to finish so I forgot to take more photos, but any questions on how I did something, feel free to ask. 


8.05.2014

Help me get this viral, maybe?

Dear Mr. Hiddleston,


            Hi, my name is Kimberly, and I feel sort of silly since you’ll probably never going see this, but here it goes.

 I could tell you my sad, sad story, but it is boring.  So instead I would like to tell you that I think that we should be good friends.  I know that probably sounds ridiculous coming from a twenty-three year-old girl from Bountiful, Utah, but I’m a good friend.  I’m sure you have many good friends, so I have a few reasons why we should become friends:

First, I enjoy watching movies.

Second, you seem like a kind man.  I am kind too, at least I am really trying to be, but there is always room for improvement right?

Third, conversations that are intelligent and witty with some humor mixed in are my favorite.  I love learning through conversation it’s the best. 

Fourth, I need a friend like you, not talking about the famous man with the loving fangirls (which I have no problem with) I’m talking about the guy with the gracious heart, the ability to nerd/geek out, and the personality that most people dream to have. (too cheesy?)

Last, I don’t desire autographs or memorabilia.  My desire is for a friend, some one to call/text to share good news with or to chat when having a bad day.  A friend to laugh with and share inside jokes with.  I would definitely keep it between us (even though I’m putting this letter on the internet) because true friendship is not something to brag about, it is something to enjoy with each other.

So Mr. Hiddlston, I hope to be able to call you Tom and my friend.


Sincerely,


Kimberly


P.S.  I have friends too, but I feel like there is always room for more.

5.21.2014

game show.

I think there should be a game show that is like "The Bachelor" but instead of some handsome guy and pretty girls, it should be people like Tom Hiddleston in his Loki costume or Benedict Cumberbatch as Sherlock... and the fan girls are the contestants, to even make it to the show they have to make it through a rigorous round of answering questions of their character - from the show, comic book, movies, myths, etc.

4.22.2014

geek or chic. both.


ADDED: picture from SLCC Sept. 2014.

nightingale armor how to. woof.
supplies:
3 yards of black pleather
3 yards of black lining (I used basic cotton) prewash
2 yards of black peach-skin
1 yard of black decorative.
1-3 yards of practice fabric (use for fitting, and how things lay together)
4 spools of heavy duty thread
measuring sewing tape
tissue paper (to make patterns)
pins
fabric and paper scissors
4 small buttons
2 large buttons
22" black detachable zipper
large cutting board [optional]
acrylic quilting ruler (saved so much time)
rotary cutter [optional]

8 finished pieces = bodice armor, mask, cloak, 2 shoulder armor, 2 wrist gauntlets, & belt.

products ready made:
black turtleneck, long-sleeve shirt
black pleather/knit leggings
black boots
black 2" stretchy headband

first thing made was the tube like bodice.  I basically took my largest measurement and make a straight tube & sewed on the zipper. starting at the bottom of the zipper and it ended up being 15 inches up on the zipper. do not cut off the rest, leave it zippable.


The front panels next started with tissue paper for measurement & fit then cut one of the pleather & one of the liner.
right sides together, sew the two pieces together.

top piece sewn to the top of the bodice with the top folded over the bodice to make a clean look.

the next three panels are to be sewn on under the previous with the sewn line hidden by the one above it.

made 4 panels for the front.
side panels wrap from the end of the front panels to the zipper, measure accordingly.

cut two of each side panel, but make sure they mirror each other, for one each side.
place & sew top side panel to the bodice, do the same with the front top panel.

fold over & sew a clean seam.

next for the middle side panel.
start of with a piece of tissue paper & design the panel to however one likes.
sketches [poor sketches] of what I want the side panels to look like.

measured the length & height of the panel while wearing the bodice.

drawing out the panel pattern on tissue paper.

 placement of lower side panel.

rough draft but it is the general look that I was going for.

 cut two, mirror image for opposite sides.

placing the cotton under the middle side panel to see layering.
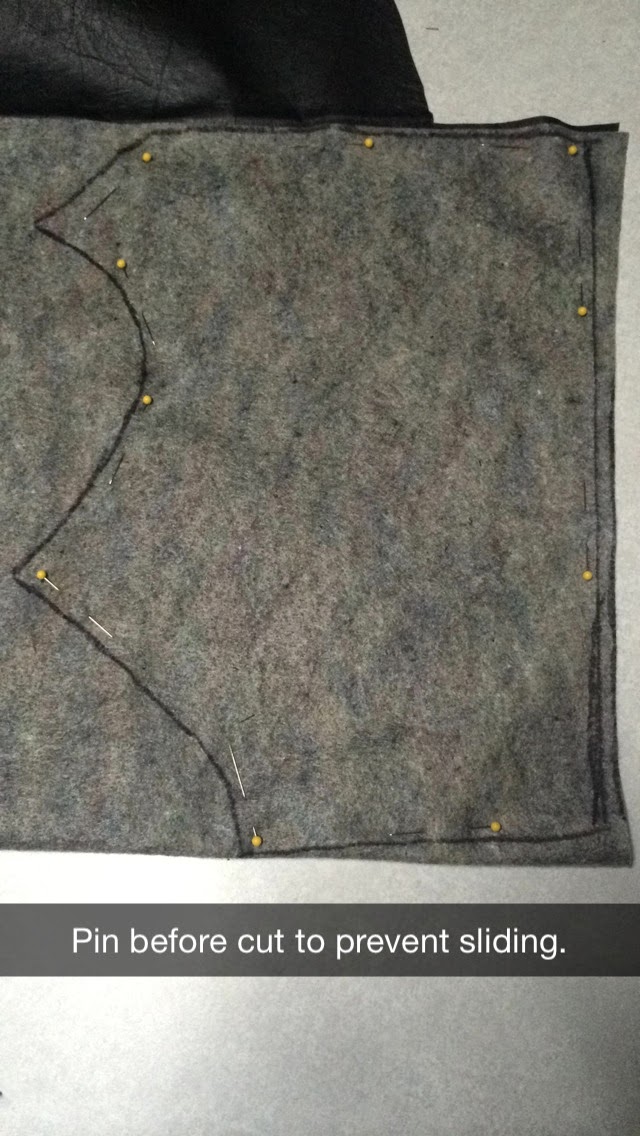
 traced the lining fabric on to the pleather, making mirror images again with the pleather.
so very important, I cannot stress it enough.
saved me during the long hours that I spent pulling all-nighters. I kinda started this project two weeks before I needed it.

I already have plans for the september comic-con, I am not procrastinating this one.

cotton on top help me know that I am sewing through both layers.
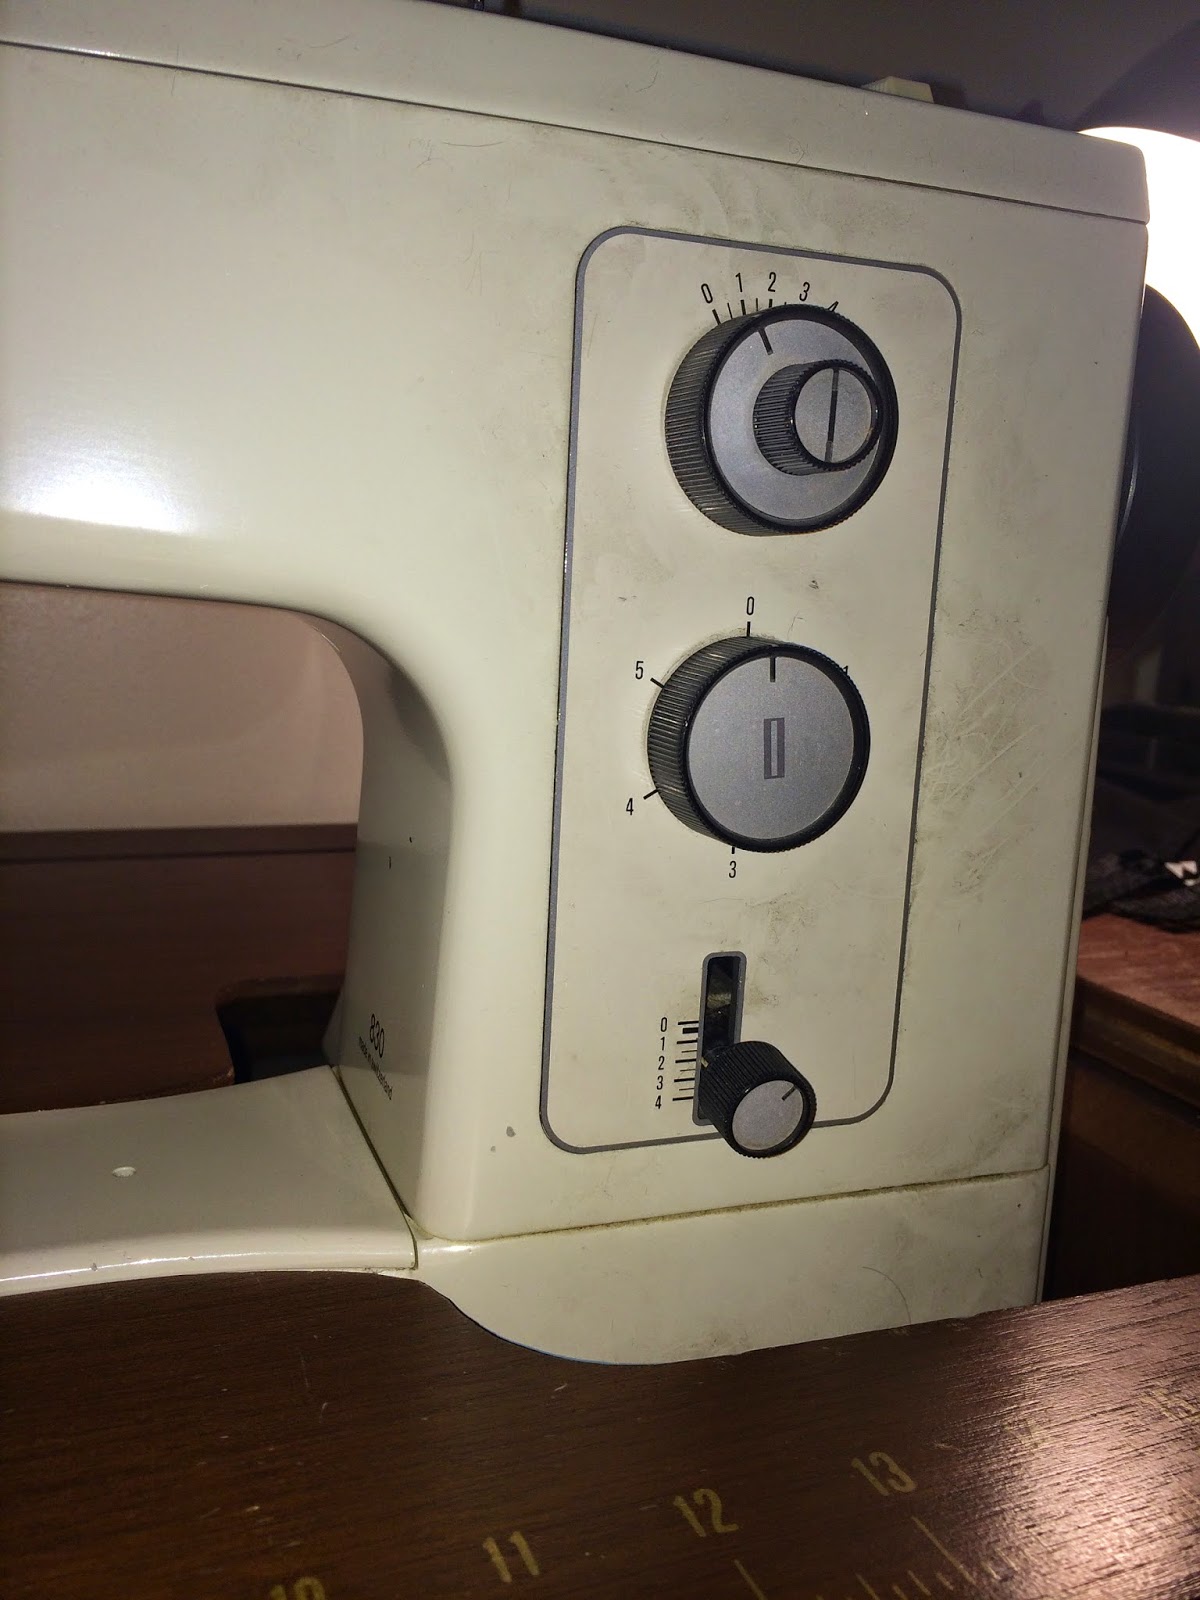
 straight

2.5 stitch length, but it is up for variation.
clip the corners for sharp corners, don't clip the seam though.

I used a 1/4" seam allowance.
 remember: don't sew all four sides, still have to flip right side out. & the top will not be seen, it's under the panels above it.
just be careful not to punch through the seam. pushing them out makes for a nice sharp corner.


for the edge to give it a crisp clean look. line up the fabric with the inside edge of the foot.

roughly 2mm seam from the edge.


while sewing the border the cotton can slip out to the edge causing it to show at the edge.

pull the cotton slightly so that the pleather is completely on top.


once all the panels are sewn on for the bodice its time to cut, sew, & place the panels onto a belt.


the front placement.


 for the top of the bodice which will be the collar & shoulders

measure the back for the same amount of what is left of the zipper.
lining for the bodice.

I copied and measured the pleather part.

cut to dimensions & sew onto the back, retracing the same seam line of the top of the bodice and along the zipper.

even no one sees it, the lining makes for a nicer cosplay.


moving on to the top.
made pieces:
6 straps
top panel
2 collar pieces

figure how it fits when worn.
sewn on under the collar/neckline piece.

placement looks good.
 cut two pieces of the mask, again mirroring each other to make the two sides.

cut lining and pleather.

 front part of the mask.

top is for the nose.
hood, hood, & hood.

this is the basic shape I used.

fabric: peach-skin & decorative.
same basic idea as the panels, just different material.

didn't sew the bottom for flipping right side out.

made a leather hood design to place on top of the hood to create the pleather decoration.


pleather decoration is sewn along the pinned line & across the front.


buttons sewn onto the bodice collar & button holes made on the hood to make it stay on.

the shoulder pieces & the wrist gauntlets are made with the same panelling technique as the bodice panelling & secured with elastic.

shoulders got three panels and the wrists got two, going the opposite direction as the shoulder.

small buttons were sewn by the elastic on the pleather as a decoration to give the illusion that they were buttoned on.

velcro at the top of the shoulder armor & the shoulder seam on the turtle neck to help hold the shoulder armor up in place.

put on all the armor, hair in a bun (if long) & put the mask on, then use the head band to hold fly away hairs out of the way.

position hood then button on with the large buttons & I think you are set.


I also would like to give credit to Beebicu for an awesome cosplay that got me hooked on the character. I was excited to do it myself and test my own skills and creativity.

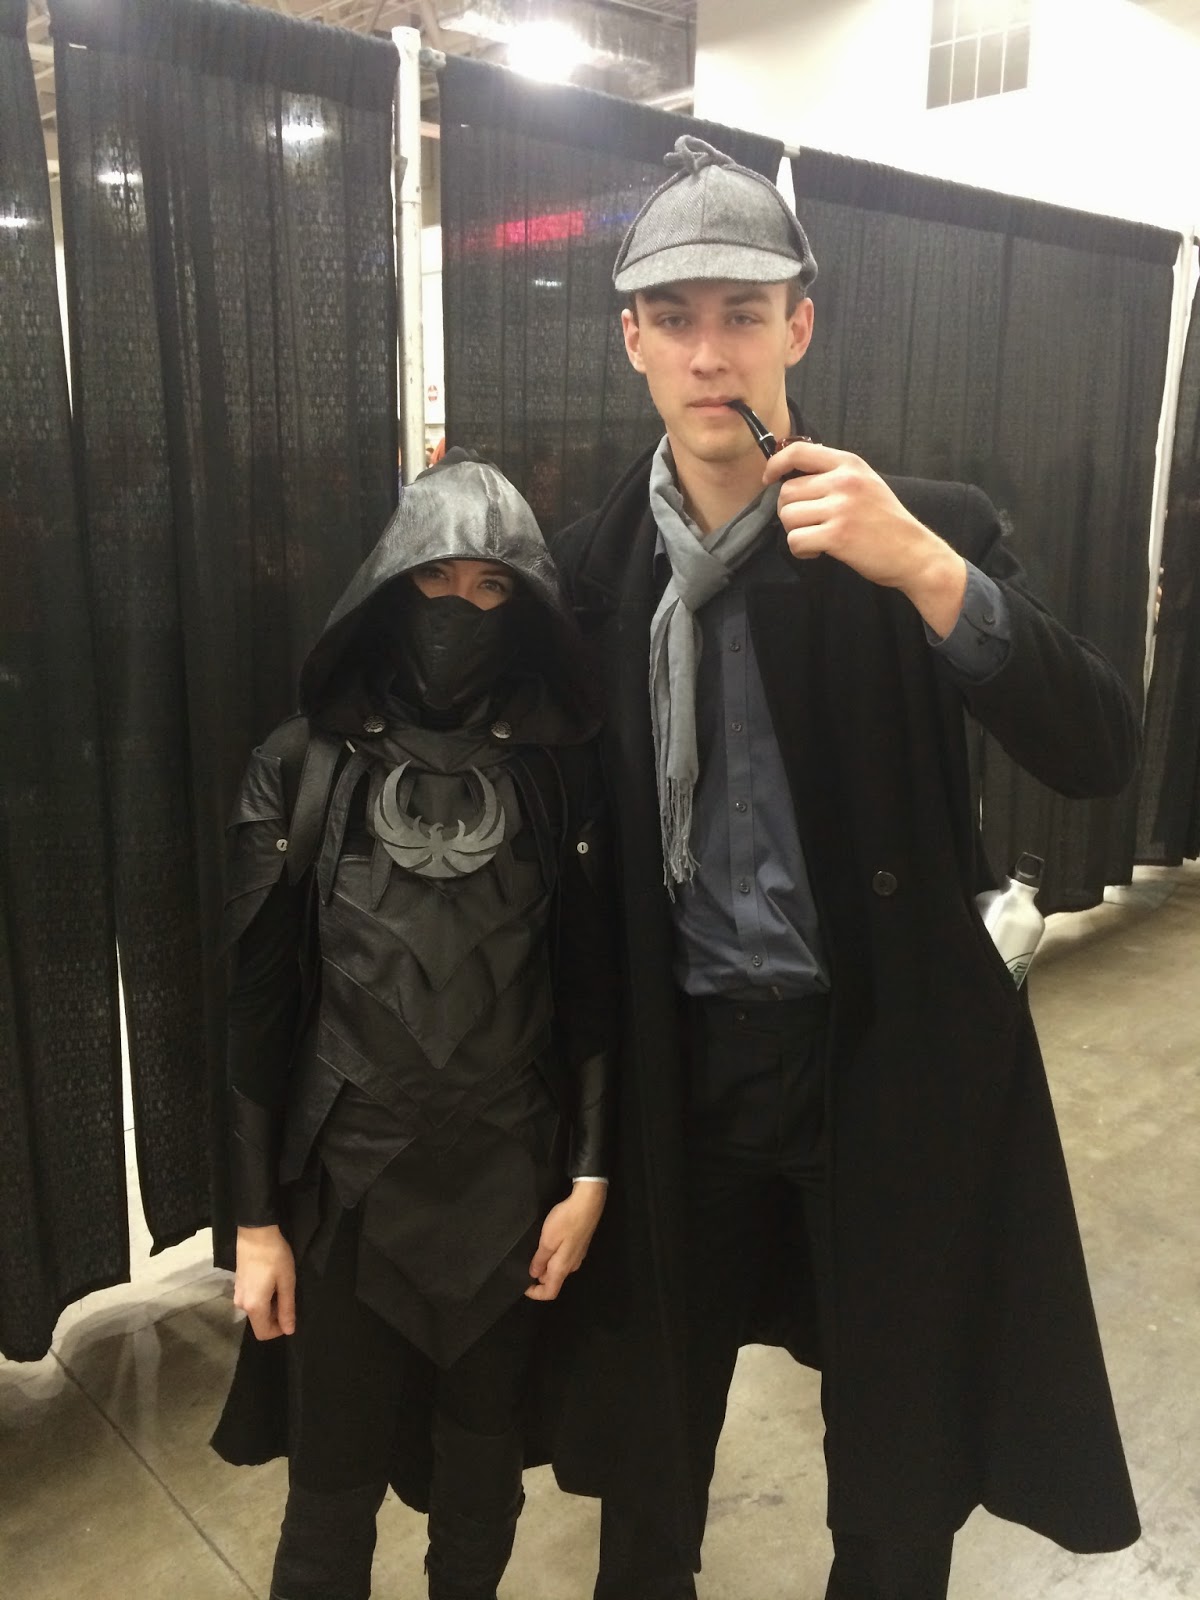
APRIL 17 - 19 Salt Lake City FanX Comic-Con @ The Salt Palace

hoping to get more [action] photos soon, but heres the comic-con ones.


UPDATE: I finally made the bow and added gloves (I don't know why I didn't have them before)


found a fellow nightingale armored chick. gotta give her props, her cosplay is wicked.


oh this is just the talented, adorable dredd. yes he made his costume too.